Showing posts with label watercolor. Show all posts

Wednesday, March 16, 2016

Fantasy Flowers


Jo Reimer: Fantasy Flowers  14x11" acrylic, watercolor, ink, paper
Sometimes a piece comes out of left field and insists upon being present within my body of work. This started one morning last year as I was dinking around with paint and a brush, just spreading color around and seeing where the wet paint would go. It got ugly fast so I put it away thinking I still had one side of the paper I could work on.  

Months later I spied it among the "works in process" drawer and decided to play on it with some ink. Hours and days later this is what emerged. I could keep working but I won't. It delights me just as is. The only bit of collage is the big yellow rose that satisfied the need for a place to rest my eyes.

Wednesday, August 05, 2015

Somewhere Over Colorado


Somewhere Over Colorado. 16 x 16".  Mixed Media.
by Jo Reimer


Here's an addition to my MAPS series. Watercolor over a  map of  Colorado.  

I love sitting at the window whenever I fly home to Arkansas via Dallas because the land below is so interesting. As one crosses the eastern edge of the Rocky Mountains  farmlands appear, dotted with thousands of irrigation crop circles. Some farms have many of these circle irrigation rigs and where the land is flat whole circles of irrigated land is painted onto the landscape. But in places only a portion of the circle is watered because of land features and farm holding borders. Here's a link to a photograph of these amazing circles.

It's sure interesting, and I've drawn them many times but this is the first time I've ventured to paint the idea of land and crops and boundaries. Of course this isn't exactly what I saw; it's a painting of the idea of circles irrigation and how it changes the land. 

The left portion of the painting is watercolor paper and I covered the map area with pastel ground so it will accept the watercolor better. The lines are drawn with sumi ink and watercolor pencil and then misted with water to blur the boundaries, then sealed with acrylic medium and wax.

Thanks to Jill Berry for the technique which she calls "Geo Papers". Jill has written a couple of books about using maps for making art. Visit her website by clicking here:

Tuesday, January 20, 2015

The Traveling Artist

Caran d'Ache Neocolor II watercolor crayons
For some reason I simply can't toss a few things into my suitcase and be confident that I'll have all I need when I get to my destination. I have to make lists upon lists to be sure I haven't forgotten something important... and this from a woman who used to teach workshops about planning and packing a travel wardrobe. But to make packing easier I keep a packed sketching kit ready for the road.

Jo Reimer's traveling sketch kit

The case is a tri-fold cosmetic case, found at AAA a few years ago. I've seen similar ones at the drugstore. Here's what's in it...
  • my small Moleskine journal, a tiny watercolor paintbox made from a mint tin, and a waterbrush. These live in my handbag at home, every day.
  • Winsor Newton travel palette with 12 basic colors.
  • a second waterbrush
  • 4 other rather small brushes with shortened handles,
  • a tiny spray bottle for water,
  • a tiny bottle of Indian Red ink and a dip pen for drawing, 
  • several half-sticks of Caran d'Ache crayons in a little plastic bag,
  • my collage/watercolor journal and a few extra bits of watercolor paper,
  • 2 UHU gluesticks and a small jar of acrylic medium with a spreader,
  • small children's scissors,
  • pens and pencils,including a couple of colored pencils
  • eraser and tiny pencil sharpener,
  • a tiny sea sponge,
  • several paper and plastic alphabet stencils,
  • a film container for paper clips and brads with masking tape wrapped around the outside,
  • a roll of clear packing tape that tears easily to use for magazine transfers.
  • small pad of watercolor postcards
  • a 2" S-hook, a carabiner and a large safety pen 
This all fits into the folding cosmetic bag. 
 
Tri-fold kit with left compartment folded inward
 
Kit opened all the way


On the airplane I position the S-hook or the safety pin somewhere in front of me on the airplane, hook the carbineer to the handle of my travel kit, and hang from the S-hook so my equipment is handy as I work.


Between trips this kit lives in my car where I also keep a spare, larger sketchbook.

What do you pack? What sort of packing case do you use? 
 

Tuesday, August 26, 2014

Blog Hop for Artists

Paintings in process in my studio
So what's a Blog Hop? It's a way to introduce new artists and their blogs to my readers.

My friend Ruth Armitage invited me to participate and directed me to answer some questions about my work. I'm happy to oblige. Thanks, Ruth.

Ruth is an energetic and creative woman who specializes in painting in watermedia. Many who live in the Northwest will recognize Ruth's early watercolor work with its focus on family photographs. She's currently working on colorful watermedia paintings that are abstractions of her memories of the family farm. When I study her large paintings I recognize fields, streams, roads, clusters of farm buildings, crop circles and so much more. She's added acrylic paint to her tool kit along with stencils and stamps and the results are amazing and are garnering her national awards and recognition. See her work here: Ruth Armitage.

Here are my answers to some rather tough questions:

How does my creating process work?


            I start work by writing. I enter my studio and go either to my computer or to my easy chair, pick up a journal and start writing, thinking about what I intend to do that day. I state my intention for the day’s work and even if I don’t stick to my first intention it still gives me a starting point. I find it’s easiest to work in series and I have several going at once… maps, family history, faith are a few series ideas on a list I made several years ago. I enjoy designing interesting composition and sometimes work on a series of non-representational pieces using papers I’ve created.


            Once in a while I need to build up my stash of collage papers so I clear off my big design table, get out different types of white paper and watermedia paint and have fun painting the papers using many different methods of surface design I learned or developed over the years of working as a textile artist. I also generate papers using stencils and stamps and simple printing techniques. The resulting papers feature unique colors, combinations, visual textures, and patterns that are unavailable elsewhere. That’s why I call myself a “collage painter”. I paint with papers I’ve created.


Painted paper file

How does my work differ from others of its genre?


            Unlike most collage artists I rarely use appropriated images in my work. It’s easy to get into trouble when using images torn from books and magazines and the resulting work tends to seem rather impersonal. I’ve lived a long time, (I’m in my mid-70s), and my life has been interesting enough that I have lots of memories of travel and experiences that produce all the stories I need to create a body of personal work. Memories are the stuff I build on, making my work unique to me. I have a strong background in design and color and am a stickler for producing pieces which are structured on good design. After decades of working with paper, paint, and textiles I find that composition seems to happen naturally, almost without thought.

What am I working on?

            This summer I’m concentrating on drawing. I believe that good drawing skills empower an artist to make better work no matter what her/his preferred genre. I enrolled in the first session of Sketchbook Skool which started in April, and am now working on the second session. I’ve become obsessed with daily drawing and my skills are improving.

Drawing - Watercolor Table
            At the same time I’m working on a series of collages which feature my big collection of old road maps, mostly of the sort that were free at gas stations all across the country. I also use AAA maps and maps collected on foreign travels. I cut the maps into strips, tear them into sections (often along the original folds line where they naturally tear), combine them with painted papers, or use the pattern of lines within a map as the inspiration for a painting.


Shredded maps and spray inks
 And now to introduce you to the three artists who've agreed to join me on this blog hop:

1.  Judy Wise: Though I haven't actually met Judy I've followed her blog for years, having seen her incredible art journals on line. Judy is an amazing woman who works primarily in encaustic and is known for her book, Plaster Studio which was published by North Light, as well as several ebooks available on her blog and website. Judy teaches both locally and internationally in Australia, Bali, and Mexico. 

2.  Barbara Loyd: I met Barbara in Athens, Greece when an art tour group met for three weeks of painting in the Greek Isles. I knew nothing about watercolor or painting and Barb knew everything. I was in awe of the skillful way she mixed color, and I'm continually amazed about her deep knowledge of color and paint. Her blog, Color in our World, is all about color, its history and its use. She taught art for many years in the Texas school system where she now lives surrounded by fields of blue bonnets. 

3.  Annie Salness: Annie is my neighbor although we hadn't met until last year when we were introduced by a mutual friend, Carol Marine. Annie has painted for years but had a major setback when a stroke left her partially paralyzed on her right side. But nothing slows Annie down for long; she taught herself to paint with her left hand and kept right on painting.  People who know her work can see no difference in her skills. She loves to paint people's pets and also enjoys commissions.

I could tell you more about these three remarkable women but the ball is now in their court and I'll leave it to them to tell you more about their own work.

Monday, August 18, 2014

Do Two Fish Make A Skool?

Fishes Teapot by Jo Reimer   
I was driving home Saturday from a round of errands when I had this crazy urge to stop at Home Goods just to see if they had something I had to have. I found this teapot! I HAD to have this teapot. It needed drawing and if I didn't buy it someone who doesn't draw might buy it and then that sweet little teapot would never be famous in that special way that teapots get when someone who loves them draws them. I'm still grinning over my find and I hope you'll smile a little, too.

Sketchbook Skool is over for the summer but I'm still drawing, not exactly like a mad woman, but lots, lots for me, at least. It's getting easier. I see the shapes more accurately and feel more confident with my marks and now I can say that I have established a drawing practice, one which I intend to keep up here on out. 

Do I plan to enroll in the next session of SBS? Yes, absolutely. It's been so good for me and for thousands of others. A new session starts in October and both of the two original sessions, Beginning and Seeing, are also available.

Wednesday, July 16, 2014

Simple Sketching Gear


Minimizing my gear for a day of sketching in the city required leaving lots of handy tools at home, and although I packed lighter than usual I still carried too much.


 These items went into my small Ellington purse: (no longer available)
  • 7" square Stonehenge sketchbook
  • Small Moleskine sketchbook
  • Pencil bag with 2 copic multiliner SP, mechanical pencil and stump, bit of eraser and Magic Eraser, mister, Pentel waterbrush.
  • Small Altoids tin with 7 colors, metal bookmark with velcro, used to mount the tin to the top edge of the sketchbook.
  • bit of terry toweling, cuff from sock, pack of tissues- all used to wipe brush.
  • large flat waterbrush
  • 2 Inktense pencils, black and sienna
  • Small water bottle
I carried my lightweight Walkstool and used it often, but probably could have found a seat on park benches, low walls, steps, or simply stood to draw.

Personal items were packed into the outside pockets (thin wallet, keys, cell phone, sunglasses, lipstick)
My little purse was jam-packed and it wasn't exactly easy to get to things. When working in the field I want to lay my hands right on the item I need.

I didn't use:
  • the tissues or the cuff. A bit of toweling is sufficient. 
  • pencil, stump, erasers
  • the sienna pencil
  • the Moleskine sketchbook
 I drank the water but could have done without carrying it since I could get water just about anywhere.
And frankly, for sketching I didn't need the watercolor kit or the brushes. It's just habit to pack them. I'm love color but all too often I mess up a good sketch by trying add color in the field.

Next time I go out sketching  I'll leave all the watercolor gear at home and I'll take a larger assortment of sizes of pens, from an .01 to a 1.0 and a brush marker, and place my attention on drawing and leave the paint for later in the studio. After this experience, and quite a few others, I hope to pare down to carrying just a small sketchbook (whatever I'm using at the time) and my pencil case with a few pens in assorted sizes.

Monday, April 14, 2014

Sketchbook Pages, Week One

 I've drawn in one of my sketchbooks every day this week and I intend to keep it up. It's a bit embarassing to post my wonky drawings but this blog is, in my mind, a way to record my work and progress so it serves my own purpose.

I'm working in an 8" square sketchbook I made. The pages are an assortment of watercolor papers, all shapes, sewn together to make nearly full sized pages. I save all my paper scraps as well as paper samples (waste not, want not) and this seemed to be a good use for them. Some papers work better than other. This first page is 7.5" x 3.5" and is sort of the introduction page.


I did this page yesterday and am NOT happy with it. The pots are okay (I'm working on ellipses which are hard for me) but the pen I used wasn't waterproof so the minute I started adding watercolor the black ink made the page gray preventing me from painting bright colored tulips.


Perhaps you can get a better idea about the sewn together, pieced, pages in this example where the larger but shorter section on the right was zigzag stitched to the narrow piece on the left. I rather like the look.

Friday, February 22, 2013

Studio Table and Watercolor Paint Choices


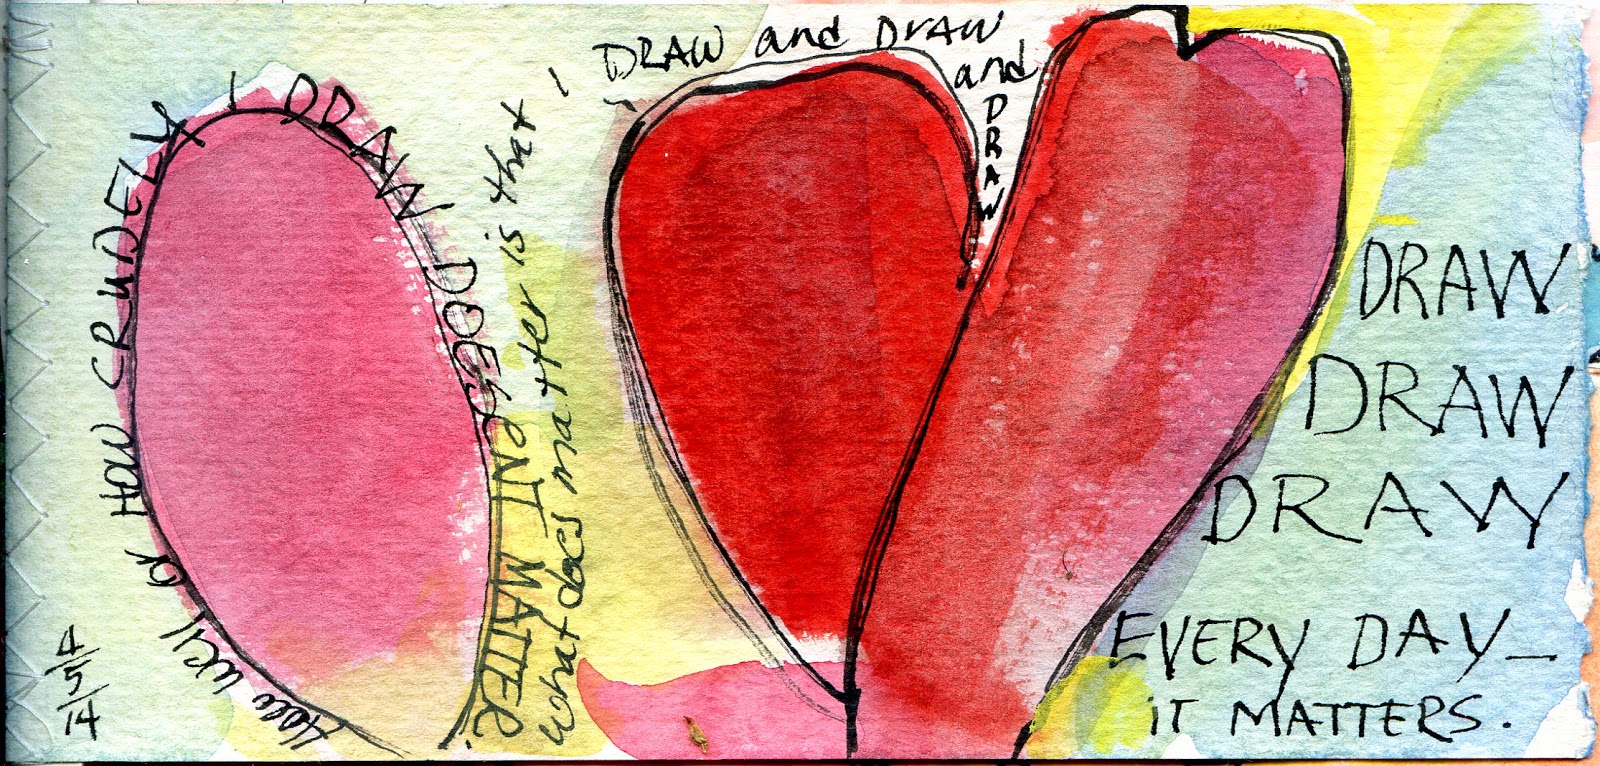
Here it is the end of the week and I haven't posted about this weeks' work in the studio. There hasn't been a lot, and no painting, no collage.  I've been cleaning up the garden instead.  But I have been working in the studio, tossing a full cabinet drawer of files and reorganizing the remaining two drawers. It feels so good to have accomplished that.

With spring coming early to Oregon I decided to spend time on my sketching tools and the various bags I carry.  Here you see an area of my counter with some of the tools of my trade. Granted I'm at the end of the process so it looks tidy but you should have seen the mess.

The black bag on the right stays in the backseat floorboard of my car. The bag was intended to be a cosmetic bag for travel but it works better for sketching and paint tools.  The open palette is a W&N Cotman kit that was a freebie years ago and has seen lots of use. It's cleaned up for the season and mostly filled with my limited palette.

Some basic tools and a book I'm reading.
In this photo the black bag on the left is another cosmetic bag that I carry when I travel. It holds tiny bits of things I might need. I'll show you what's in that in another post if you're interested. Most things on this part of the counter are obvious and good ways to corral pens and pencils that are frequently used. The wire thingie is a vintage flower frog.  It really doesn't work well, prefering to hold flower stems, but I like how it looks so it stays there. The box cutter lives in a vintage glass tray that once held a dentist's picks.


Here's the car paint bag closed.
10" x 7" x 3"
nylon
I added D-rings on each side at the top and clipped a shoulder strap to the rings. There's also a metal shower curtain ring hanging on one of the handles so I can hang the case using an S-hook that lives inside. I've used this on an airplane quite successfully.

Opened partially, showing the handy compartments.
Opened all the way.
Check your local drugstore to see if you can find this Basics Cosmetics case. It's a dandy.

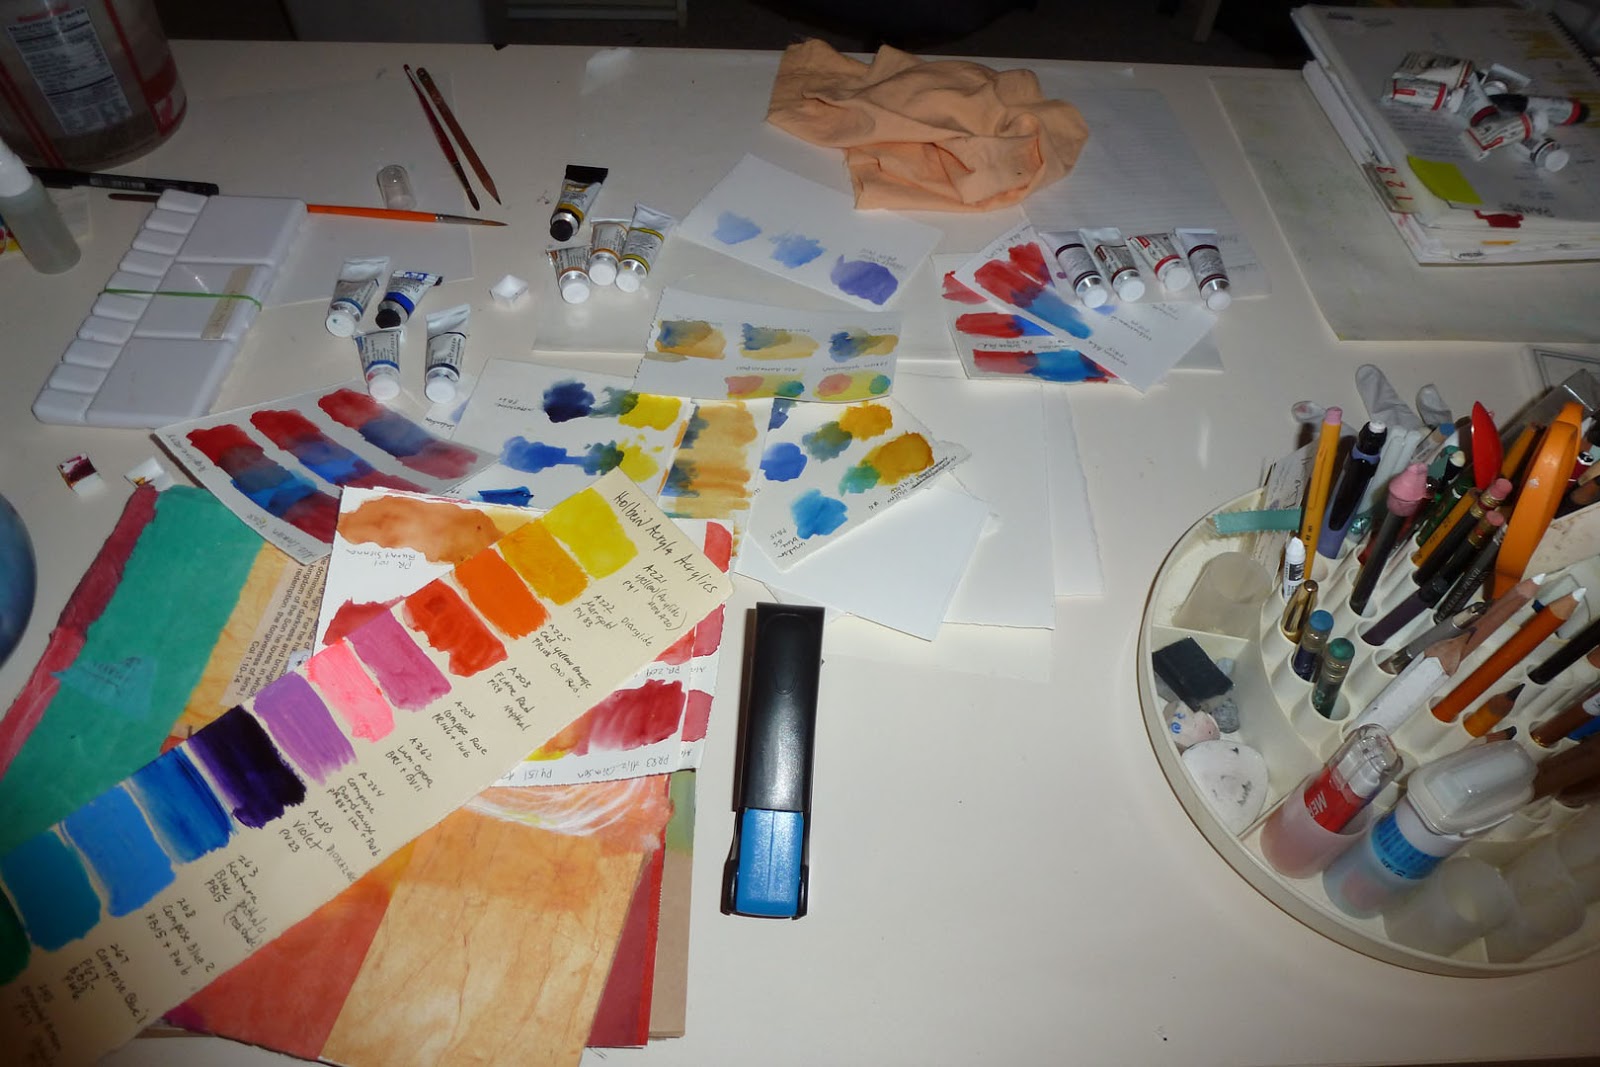
Watercolor, Collage, Journaling Table
This table is 30 x 60" and is a workhorse, used for all kinds of things, but this week it's where I've been testing watercolors in combination to see which I want to use in early spring.  The basic six that will help me capture the clear bright spring colors are Azo yellow, New gamboge, Winsor Blue GS, Ultramarine, Alizarin Crimson, and Winsor red.  Of course I'll modify and add to these basics, but for now that's what I'll play with.


For testing I gathered a stack of small pieces watercolor paper scraps and proceeded to test. I don't really know how to approach this so I just winged it. I first chose 3 blues and painted large spots of each down one side of the paper (see upper middle of picture) and then chose one yellow and painted beside and into each blue to see what sort of green the combination would give me. And that's how I approached each color in turn.

If you have a better way, please let me know.

I know I'll be painting with acrylics again and wanted to see how complete is my collection of Holbein Acryla acrylics. (The long narrow strip in the lower left of the picture is my record of colors I own.) Holbein uses such odd color names. For example, Flame red is really Napthol, PR9, but the only way to know that is to find the tiny paint number on the back of the tube.  So I hightailed it to Blick downtown and wrote the paint number on my Holbein chart so I'll know what to order in the future and bought a replacement since that's a frequently used one. 

Or maybe I'll revert to slinging paint based on what it looks like.  Probably will. Being organized takes the fun out of it for me.  So why go to this trouble? I need to know how to mix paint properly before I have the confidence to work with abandon. Otherwise I'm sure I'd just make ugly messes... like I've done too many times already.

That's my story and I'm sticking to it.  I hope you all have a great weekend.  Make something pretty.

Tuesday, April 03, 2012

Watercolor and Foil on Text

by Jo Reimer


I've seen several examples of watercolor and drawings done on top of the text in old books so I decided to try my hand at it after reading Jane Fazio's post this morning. My first attempt wasn't the greatest but it lead to another discovery... using foil with watercolor, a lemons into lemonade experience.

I used paint straight out of a tube of M. Graham watercolor which had sat too long and had a bunch of sticky honey right at the top. I was working too quickly and didn't notice the honey until it was on the paper. When it refused to dry right away I  looked around for a solution, something to soak up the stickiness or to cover it.  I grabbed a sheet of foil, the sort used by rubberstampers and surface designers, and applied it to the image. This left sparkles of foil on the petals of the flower. Pretty in person but it doesn't show up in the scan where it looks like black blobs. Metallics don't photograph well because of the way they reflect the light.

Following Jane's example I cut around the drawn and painted image and glued it into my journal. Now I'm thinking that I'll keep an old book handy and take a few minutes here and there during my day to sketch something and add watercolor later so I'll have all this wonderful material available for other uses. It'll refine my drawing and observation skills and give me another opportunity to record the beauty of my days.

The book page I worked on had glossy paper which didn't take the color well. Use uncoated paper pages.

If you don't have sticky watercolor paint just rub a glue stick across your drawing and apply foil to that. Experiment first so you'll know at what point in the drying stage is best to apply the foil.

You can draw with liquid glue and then foil that. Have fun and tell me about your successes and failures.

Go here for more information on using glue and foil. Jones Tones makes glue and foil which is available at craft stores.


Friday, February 03, 2012

Golden Morning Light

by Jo Reimer
Golden Morning Light
10 x 13
watermedia
As I opened my eyes this morning and looked out the window the trees to the west were bathed in an intense golden light which turned non-descript gray barked trees into something magical. I tried to capture the essense of the moment. It's there but mostly in my memory. My painting skills aren't there... yet.

Monday, January 30, 2012

Randall David Tipton workshop

by Jo Reimer
Refuge
Watermedia on Yupo
20" x 13"
Refuge
matted

I participated in a workshop with Randall David Tipton over the weekend, making paintings on Yupo, a plastic "paper" from Japan. Randall shared his methods for using watercolor and acrylic paints and mediums on this interesting surface, but most importantly he talked to us about interacting with the landscape and remembering the emotion of the moment in order to make a painting without being photo-realistic. We mostly painted from memory.

In the past as I've moved through the landscape and been moved by the beauty of this earth, my thoughts have been rather useless for informing future work. I didn't think carefully about what I was seeing. I didn't ask questions of myself, like 'what is it about that patch of brush that I find beautiful?' or 'why does this particular sunset move me to tears?' 

I do take a lot of photographs and am careful about compositon which does help with memory, as does sketching. But being mindful about the emotions of the moment is necessary to making good paintings later.

Undersea
Watermedia on Yupo
20" x 13"
Undersea
matted
A mat makes a big difference in
the presentation of a finished piece.

Randall's website is here and his blog is here. His work is available at the White Bird Gallery in Cannon Beach and directly from him. His price list is on his blog.

My work is also available.


Thursday, September 08, 2011

Urban Sketchers


Sketchcrawl esteponero - Malaga - Spain from Urban Sketchers on Vimeo.

I love to watch other people sketch almost as much as I like to do it and as I watched this video I made several observations that might help you on your next sketch outing. You DO sketch, don't you?
  1. Use a 7-day pill container to hold your paints
  2. Use a sea shell for water supply.
  3. Note that most people use a waterbrush. Available at art and hobby stores, the barrel holds water, or ink.
  4. A small amount of paint is enough to explain the colors; don't over-work the color.
  5. Notice the different sizes of sketchbooks; one person uses single sheets of paper clipped to a backing board.
  6. Notice how people hold their pen while sketching; notice how carefully and often they look at their subject.
  7. Joining a group like Urban Sketchers for a day looking at your community is lots of fun.

Sunday, November 21, 2010

How I Spent My Weekend

Cannon Beach Post Office

I've often stopped in local post offices and asked to have a page stamped in my sketchbook; this is the first time that I've been told that I have to buy a stamp in order to have them use the cancellation stamp! So I bought a penny stamp. I rather like the addition of the stamp so I'll probably buy one every time from here on out.

Haystack Rock - Cannon Beach, OR

Shadow walking


Kelp grows as underwater forests which are easily dislodged by storms. This kelp bundle, along with 6 others, was on the beach after last week's storm.


Tops

Roots

Today the sun disappeared and hail on the beach drove us homeward. Snow above 1000 feet.

Here's a little video of my snowy drive home. 

Wednesday, September 29, 2010

The Sketchbook Project - Mountains

Mt. Hood
Pencil, pen and ink, watercolor crayons.

Mt. Hood is only 50 miles east of Portland and lures many Oregonians to its beautiful slopes for skiing, hiking, fishing and many other sports, both summer and winter. Part of the Cascade Range of volcanic mountains, it often appears to float above the city due to atmospheric conditions.  At 11,230' its distinctive volcanic shape is hard to miss.

Wednesday, December 02, 2009

Morning on Discovery Bay


Our family spent Thanksgiving with our daughter's in-laws who live on Discovery Bay in Washington State, right across the bay from Port Townsend, in such a lovely setting, as you can see from my sketch. I cherish my memories of waking up very early when the light was just beginning to separate light from dark, when all the world was in silhouette, and all was quiet. I was told that there's a single loon living there, one who's lifelong mate has died. I've felt sadness in the call of the loon, and especially with this one who's now alone for life.

Tuesday, November 24, 2009

Paintbox + Velcro + Bookmark


While watching a video by Free(k)hand showing one of his watercolor sketchbooks I spied a spread about his watercolor box holder and decided to make my own. While not as tidy as his, mine works great for my purposes. The box is an Altoids gum box, spray painted white on the inside with Rustoleum. I used double-sided carpet tape to adhere the half pans, filled with my favorite colors, to the box.

I located a metal bookmark and glued velcro to the head of the bookmark using Tough As Nails glue, and the companion side of the velcro is glued to the bottom of my paint box.


To use this little contraption when I'm out painting I simply take the bookmark out of the pocket in the back of my Moleskine and slip it onto a page of my notebook with the head sticking out at the top and fasten the paintbox to the bookmark and paint away, using a waterbrush.  How cool is that!


Wednesday, September 09, 2009

Hawaii Art Journal

I had grandeous ideas about journaling every day, every time I had a minute to sit down I'd add a sketch or words or paste in some decorative bit of paper, and every day I'd work with my grandkids and help them build their own journal. Right. Best laid plans for journaling never seem to work out for me. Some of these pages have appeared here in my blog as "starts". I added to a bit to them on location but most have been completed since I got home.
I stripped the airline magazine of interesting words and pictures and culled more from a variety of advertising brochures that I picked up in stores or at the airport. These add interest to my pages but they weren't used except to augment entries about something we actually did or saw.


Our grandson, Lucas, added much of the comic relief to our days but he never did get adjusted to the 3 hours difference in time zones, insisting on getting up before the sun rose.

Since this blog is supposed to be about my art-making I'll tell you a bit about how I created each page and if you have other questions just email me. The fruit page was so simple. I used a commercial scrapbooking paper cut to fit my journal and added the text by hand and the title using a stencil.


Starbucks is another scrapbook paper with photos and stencil. I'm trying to remember to take shadow self-portraits often. It's usually only possible in early morning or late afternoon when the sun is low. The people in the small photo are my daughter and four grandchildren.


This page was spray stenciled at home and I added lots of bits later. The photo is of my son.


This paper was painted and stenciled at home with a bit of fabric and a garment label stapeled to the paper.


I did this watercolor sketch from a photograph.


And this sketch is from a magazine picture. I usually don't use photo references from anyone else but this is an exception.


Prepainted paper with label torn from the ice cream cup and a photo of the trunk of a tree.


This page was created at home using fabric, paper and my sewing machine, and the writing that can't be read was done on my anniversary when my husband got sick and we had to cancel our celebration plans. I was a little upset but more for him than for me. He so wanted to give me a day to remember and he couldn't help getting sick. We'll both remember this day for several reasons. It really was a wonderful day from the beautiful sunrise to its quiet end. Our precious son-in-law cooked a gourmet breakfast for everyone, we enjoyed time with all our family, and we had some time away in a beautiful place. And when we returned to our house we had peace and quiet to rest and dream and pray. It really doesn't get any better than that. And I didn't have to cook a single meal all day.


I intended for us to recite our vows for our family and at breakfast I started talking about our wedding day. I described the pink suit i made and wore for going away, with its matching hat, white shoes and gloves, and how we stopped for dinner at a chicken restaurant, and wondered how the owner knew that we were just married. But I didn't get much farther than describing the place we stayed before I got all teary with nostalgea and couldn't go on and pull off the recitation of vows. But we do still love and cherish one another through bad times and good and we'll still be together when one of us dies.


This is the view from our lanai, a watercolor done one afternoon while we were enjoying pupus and drinks. Everyone was fascinated, watching me capture what I saw, and I drew a couple of ooohs and aaahhs when I painted the sky. Some people are so easily entertained!


This is a stencil I cut from a photo of my youngest granddaughter, Sarah. She's such a sweetie, full of energy and fun and ideas for what to do next. All the kids are waterbabies and strong swimmers so they all took to snorkeling very quickly, and even had a Snuba lesson... diving with an instructor and their father floating above ready to come to their rescue. He's a certified diver.
Rick rack makes excellent waves aboue a colorful fabric ocean, don't you think?


This was my planning page. I added a couple of plastic slide holders to the page and inserted a luggage tag and my boarding pass as well as a bougainvillea flower petal. And I made lists of things I wanted to do.


That's it. I have a few blank pages of watercolor paper and will do a few more sketches in the book but it's essentially finished and I'm ready to move on.
Related Posts Plugin for WordPress, Blogger...